# Setup Mail
This page refers to the use of **Mail Portal**
**Mail Portal** is your one-stop mail administration, webmail, contacts and calendaring gateway.
### How do I access Mail Portal?
* You can access Mail Portal at your mailserver hostname (or homepage) from a web-browser.
***
### What is Mail Portal?
**Mail Portal** is your one-stop mail administration, webmail, contacts and calendaring gateway where both administrators (MasterAdmin, DomainAdmin) and email account users (MailUser) can log in to access services.
As a ***DomainAdmin*** (Shared plans) you can add domains, create email accounts (MailUser), aliases, forwarders, sender addresses, domain aliases, relay domains, set up automatic migration and fine tune many other settings and features (including updating password, enabling 2FA, or passwordless MFA).
As a ***MailUser*** you can add addressbooks (CardDAV), calendars (CalDAV), server-side sieve (message) filters, vacation auto-responder, access webmails and fine tune many other settings and features (including updating password, enabling 2FA, or passwordless MFA).

***
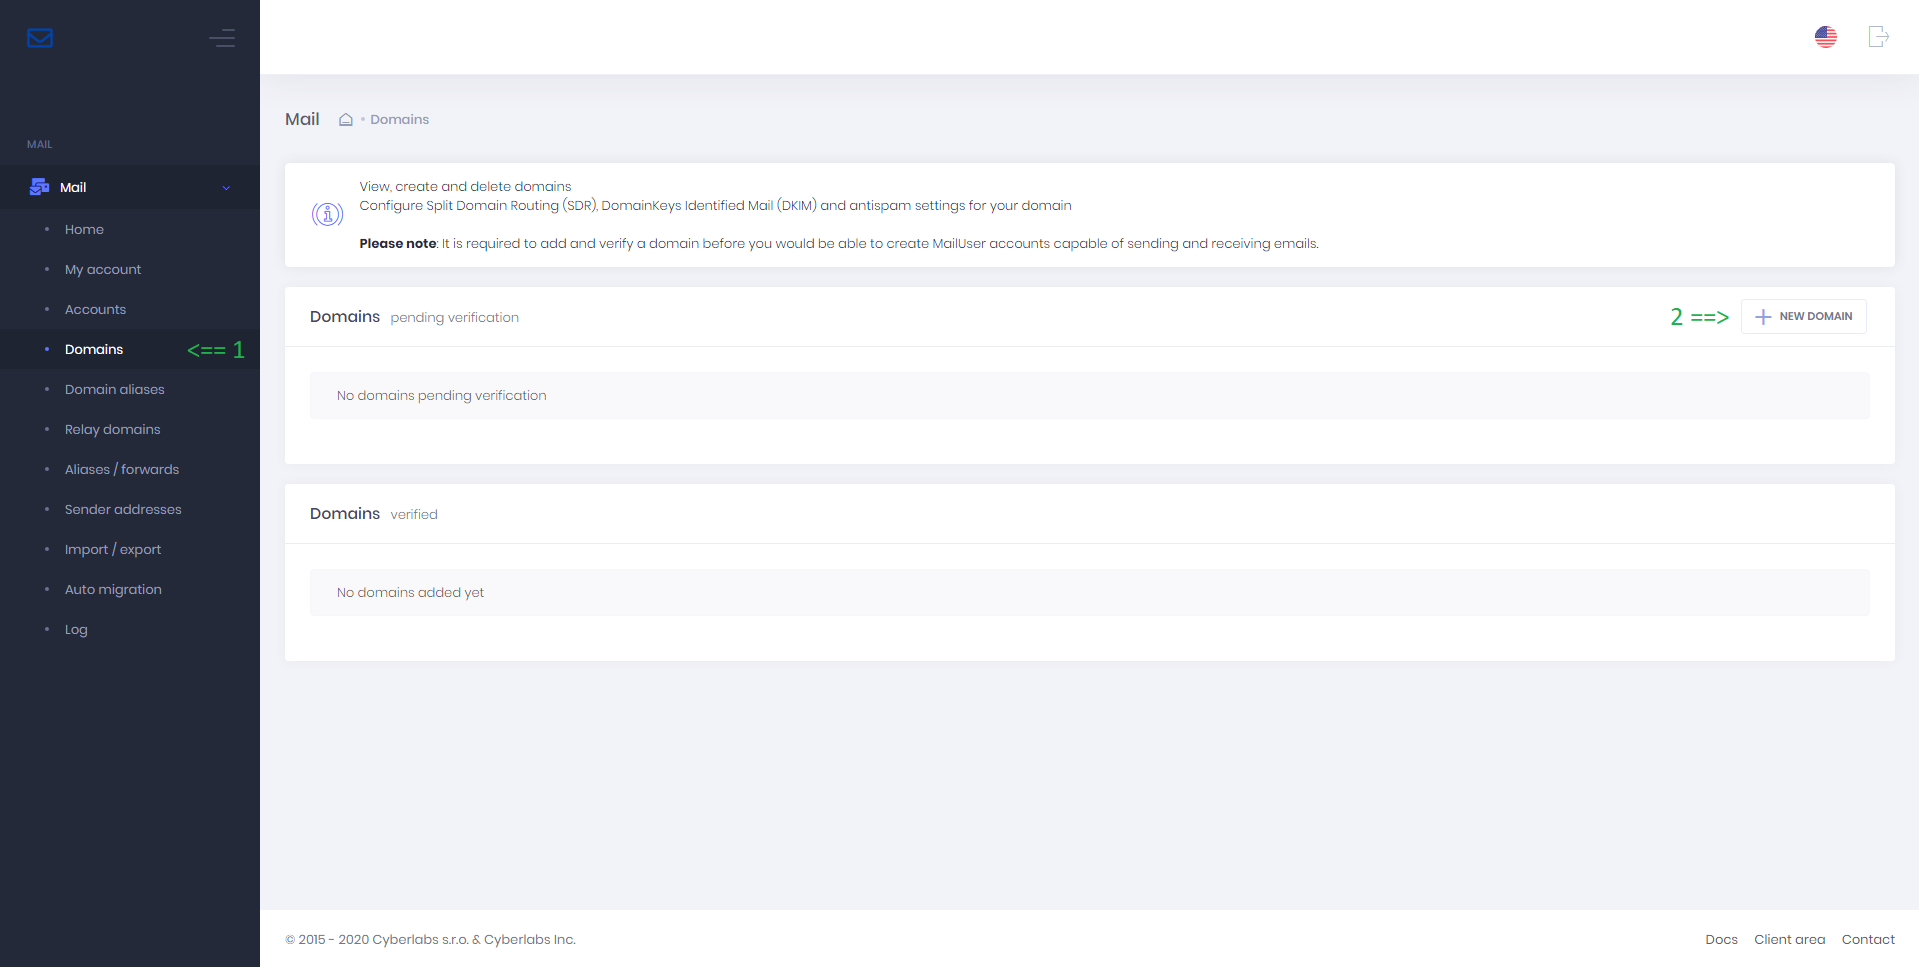
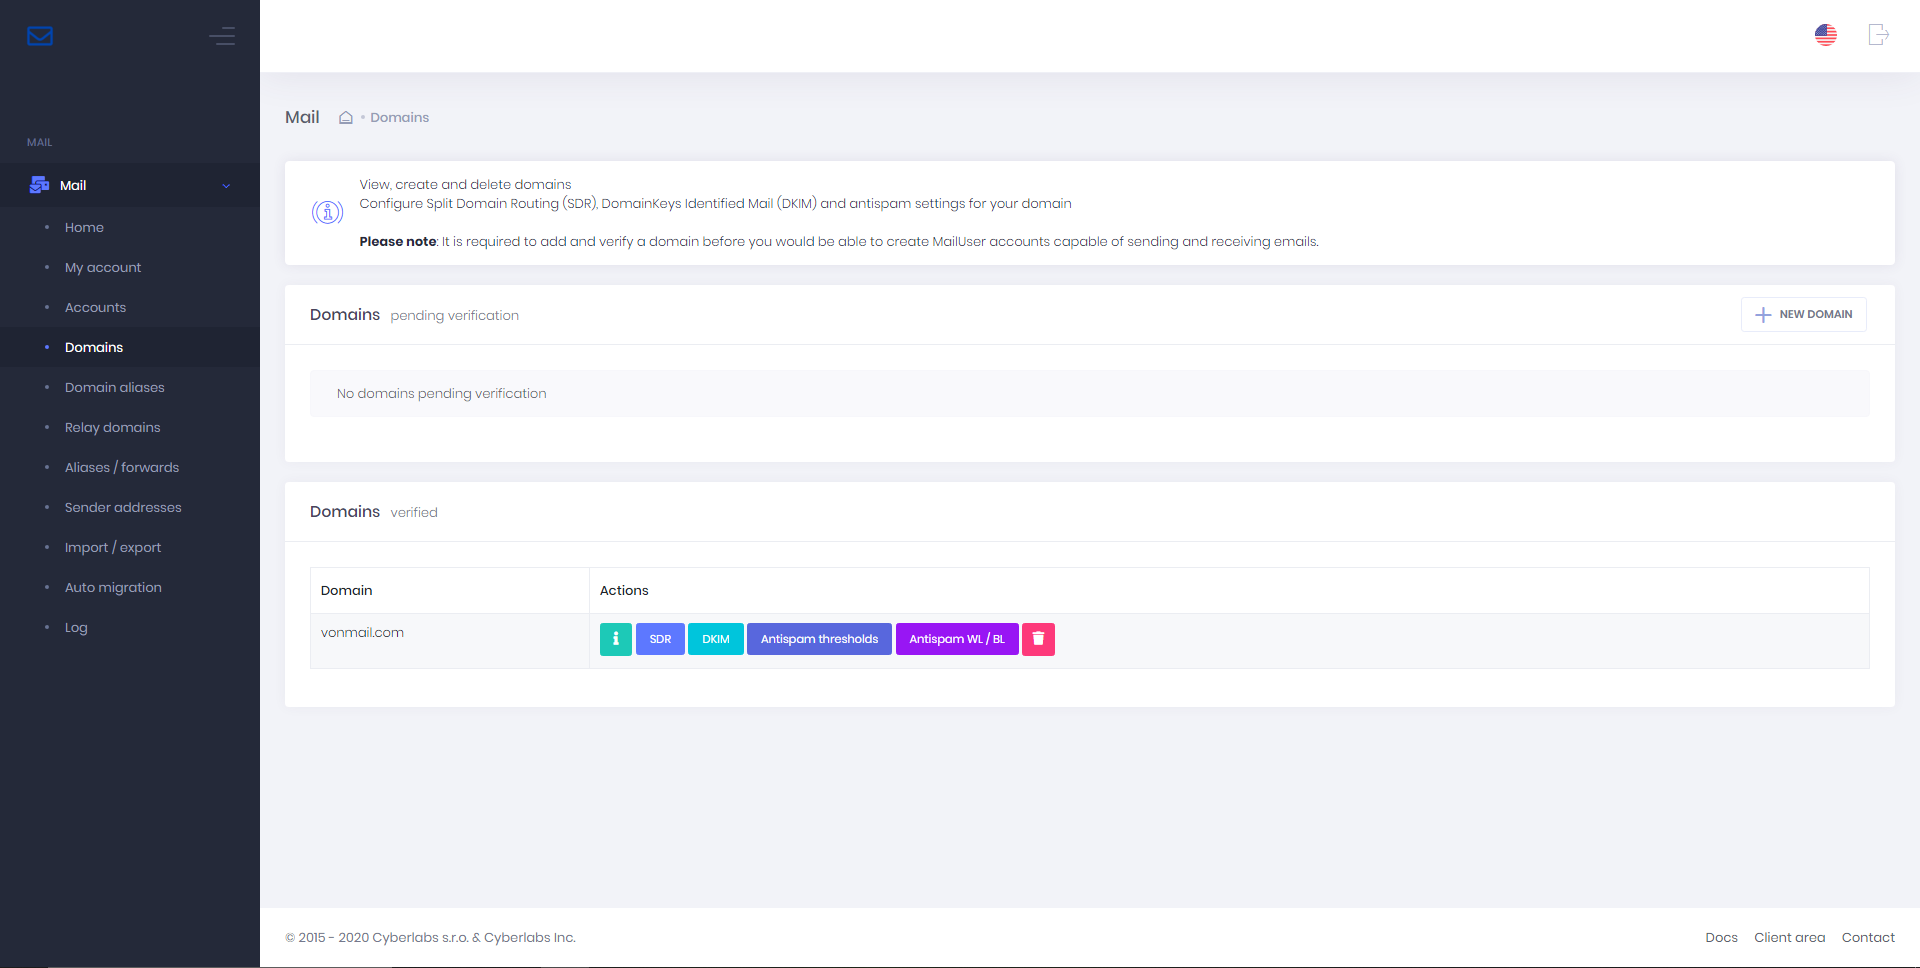
### Add domain
Step 1. From the menu bar, select > **Domains** > **New domain**
Step 2. In the **Add domain** window, enter the following details:
* Domain name: your domain name
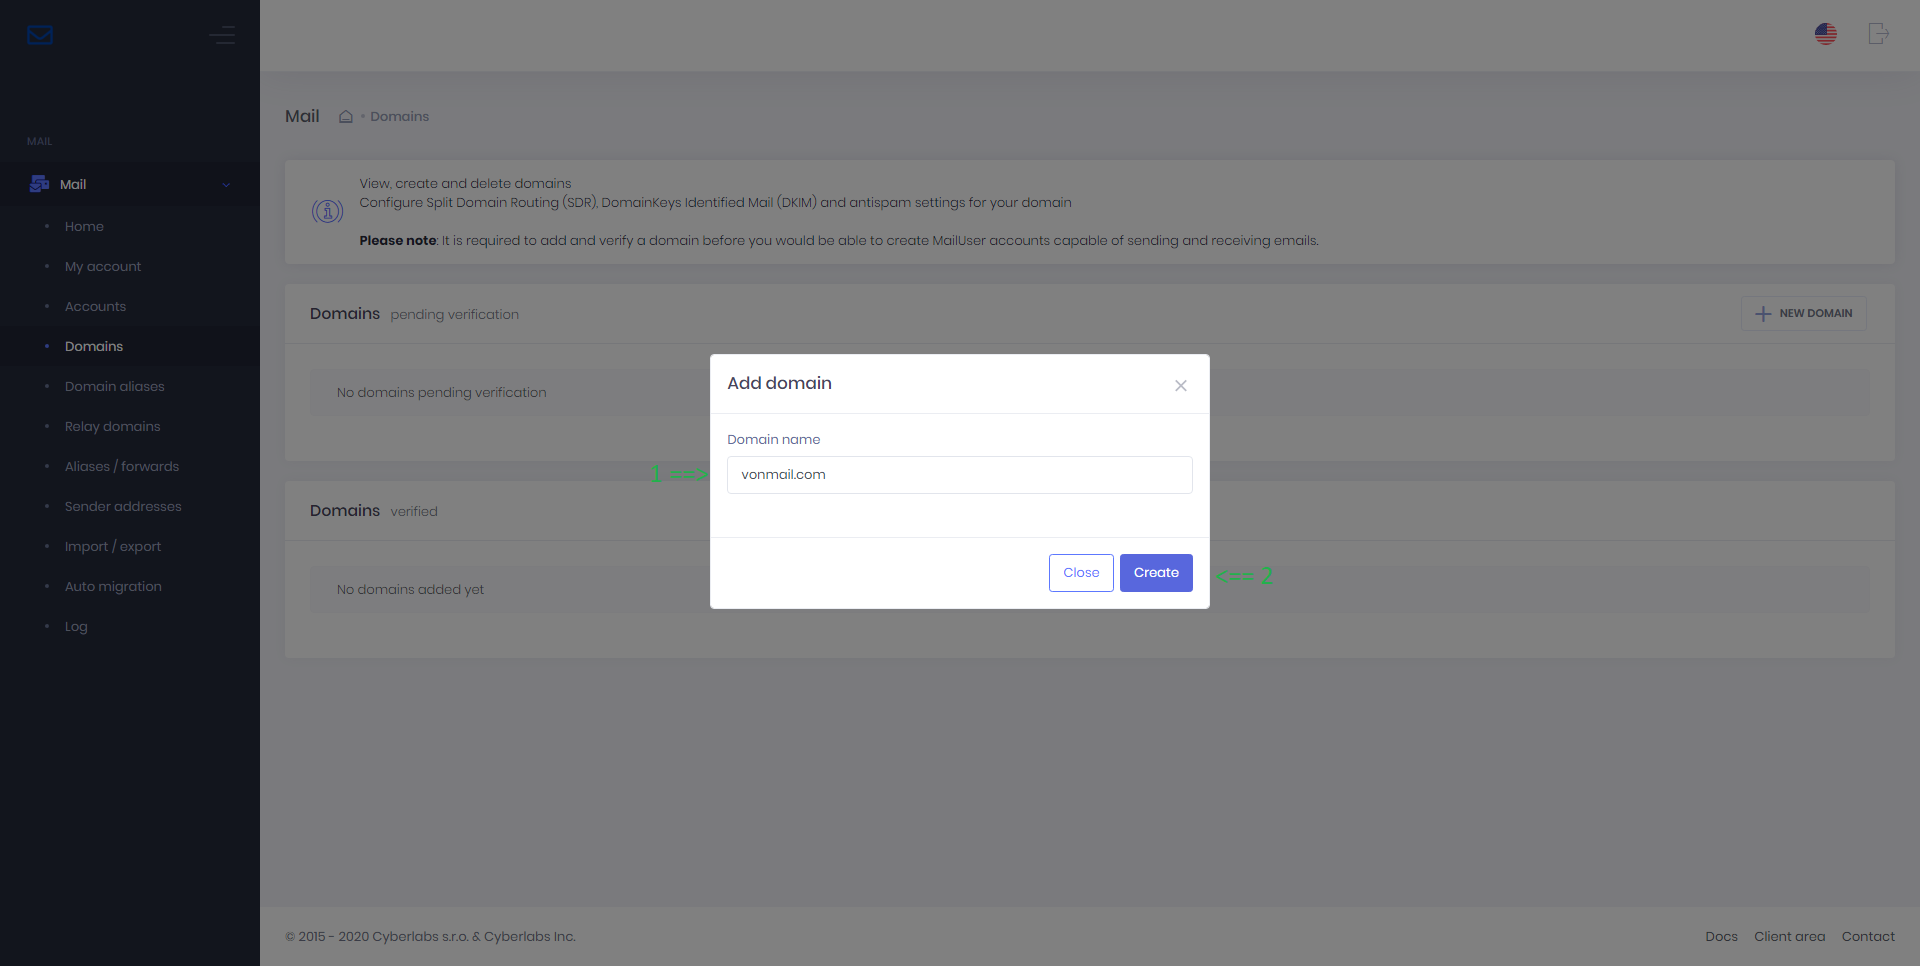
Step 3. Press the **Create** button
Step 4. Your domain is now added, pending DNS TXT based verification.
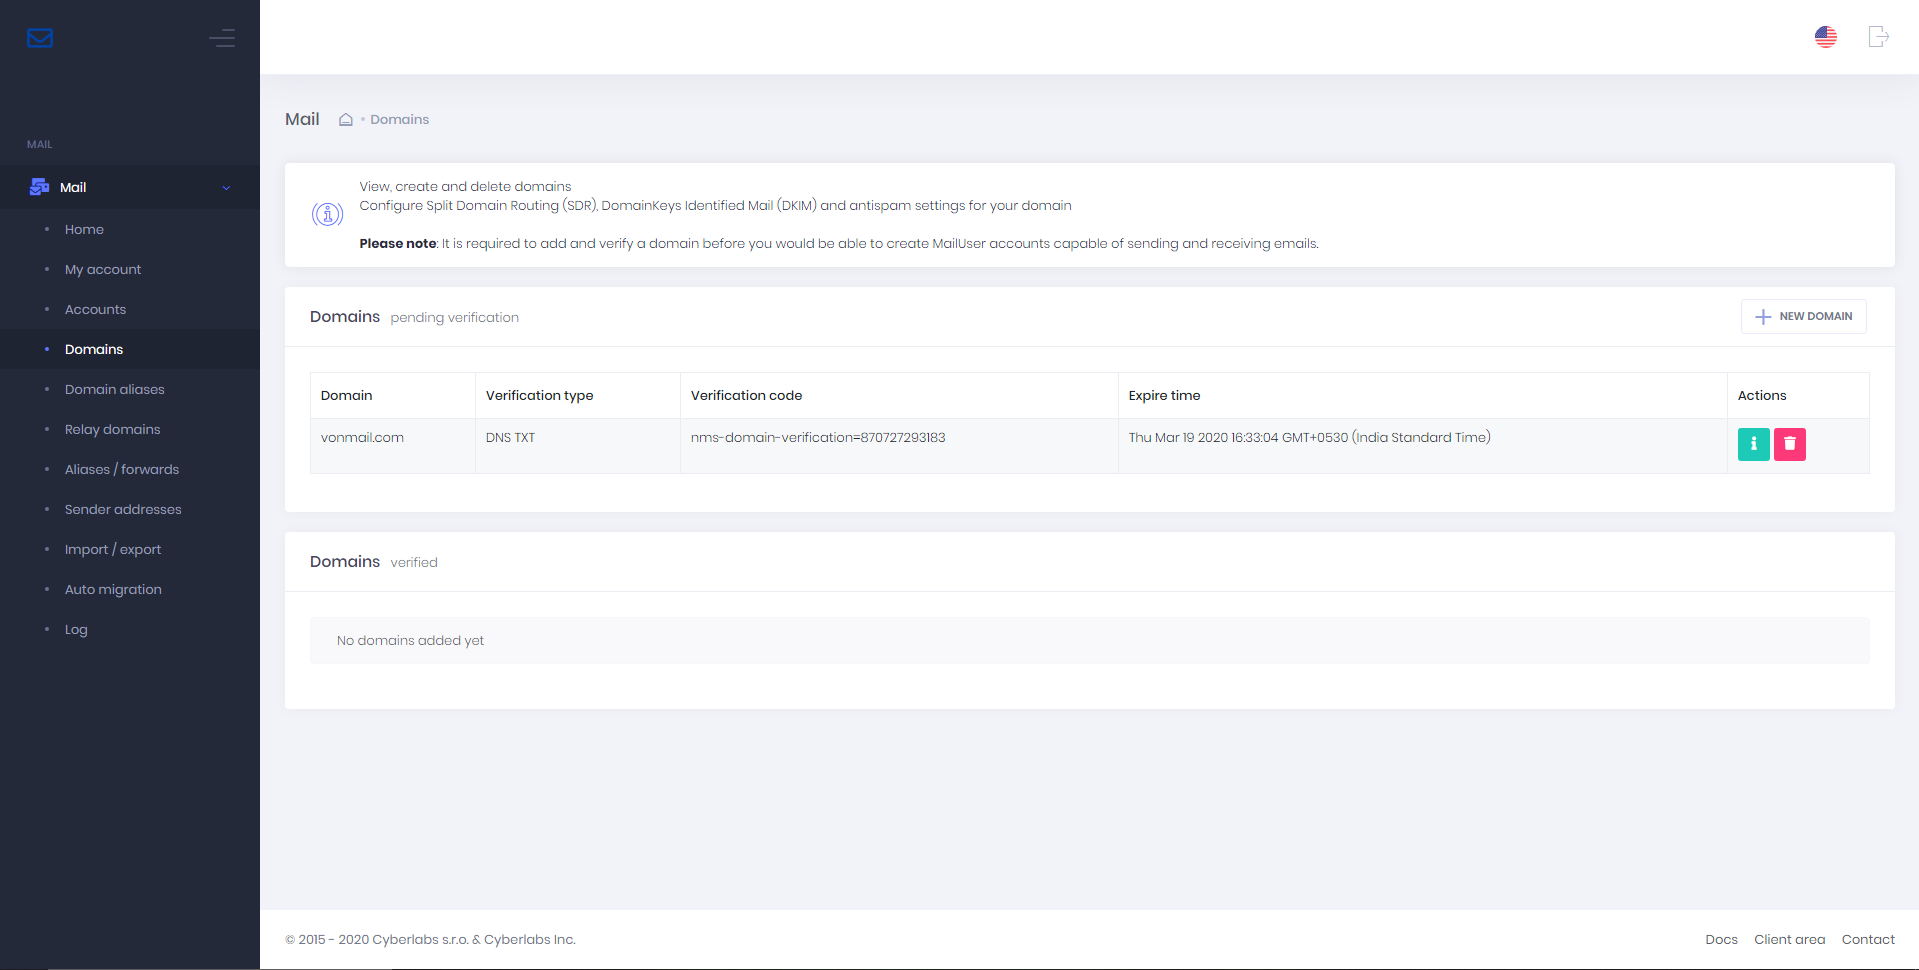
#### Verifying domain
To verify domain, log in to your DNS manager (usually at domain registrar) and create a new DNS `TXT` record for your domain with value corresponding to the above generated verification code.
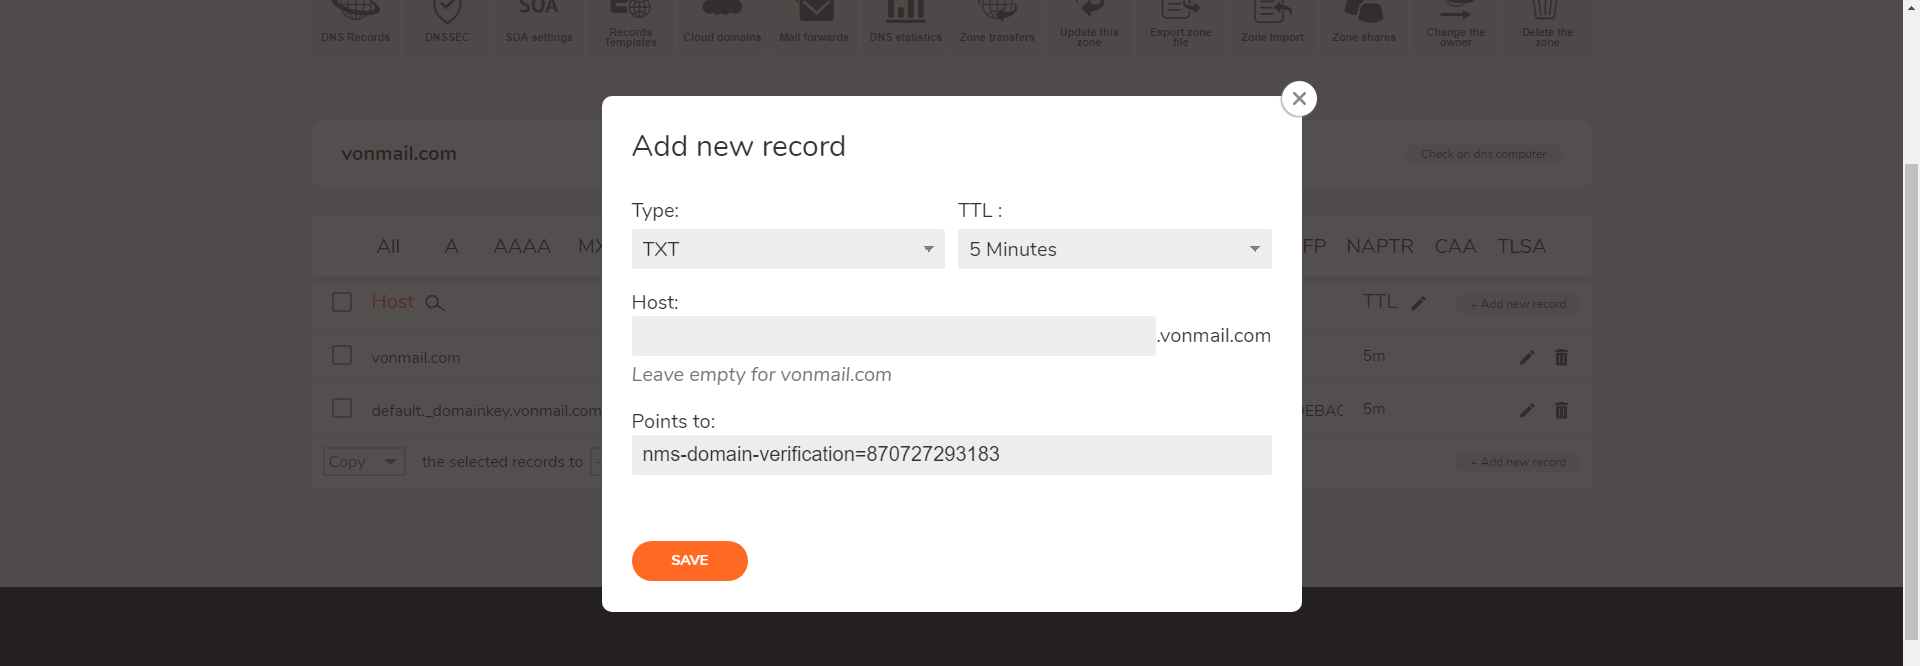
Once the record has been added, please wait for it to propagate (may take up to 24-48 hours depending on your previous record’s TTL) after which the system would automatically detect the change and verify the domain.
***
### Add email account (MailUser)
Step 1. From the menu bar, select > **Accounts** > **New account**
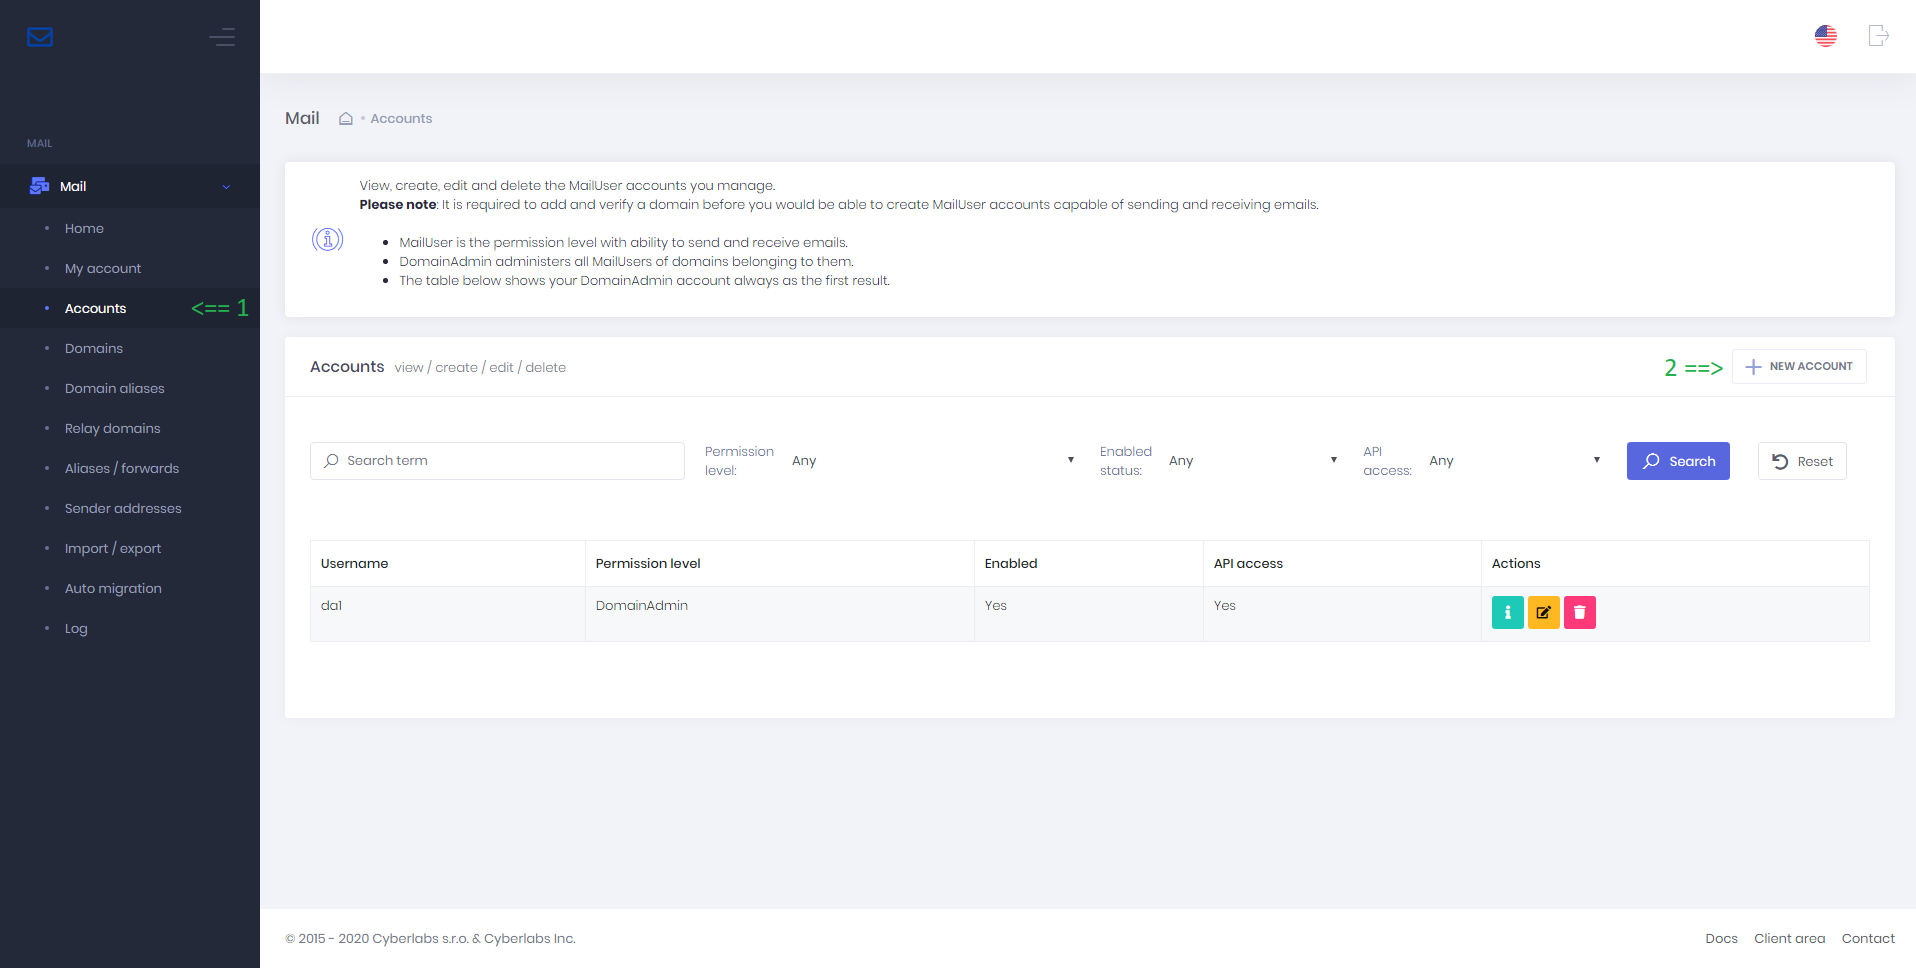
Step 2. In the **Add account** window, enter the following details:
* Permission level: select `MailUser`
* Username (email address): your email address
* Password: your password
* Confirm password: repeat your password
* Enabled: toggle ON position (default)
* API access: toggle ON position (default)
* Recovery email: another email address at which you can receive password reset emails
* Language: select language (only English is supported at this time)
* Storage quota: enter storage quota value in MB

Step 3. Press the **Create** button
Step 4. Your account is now added
***
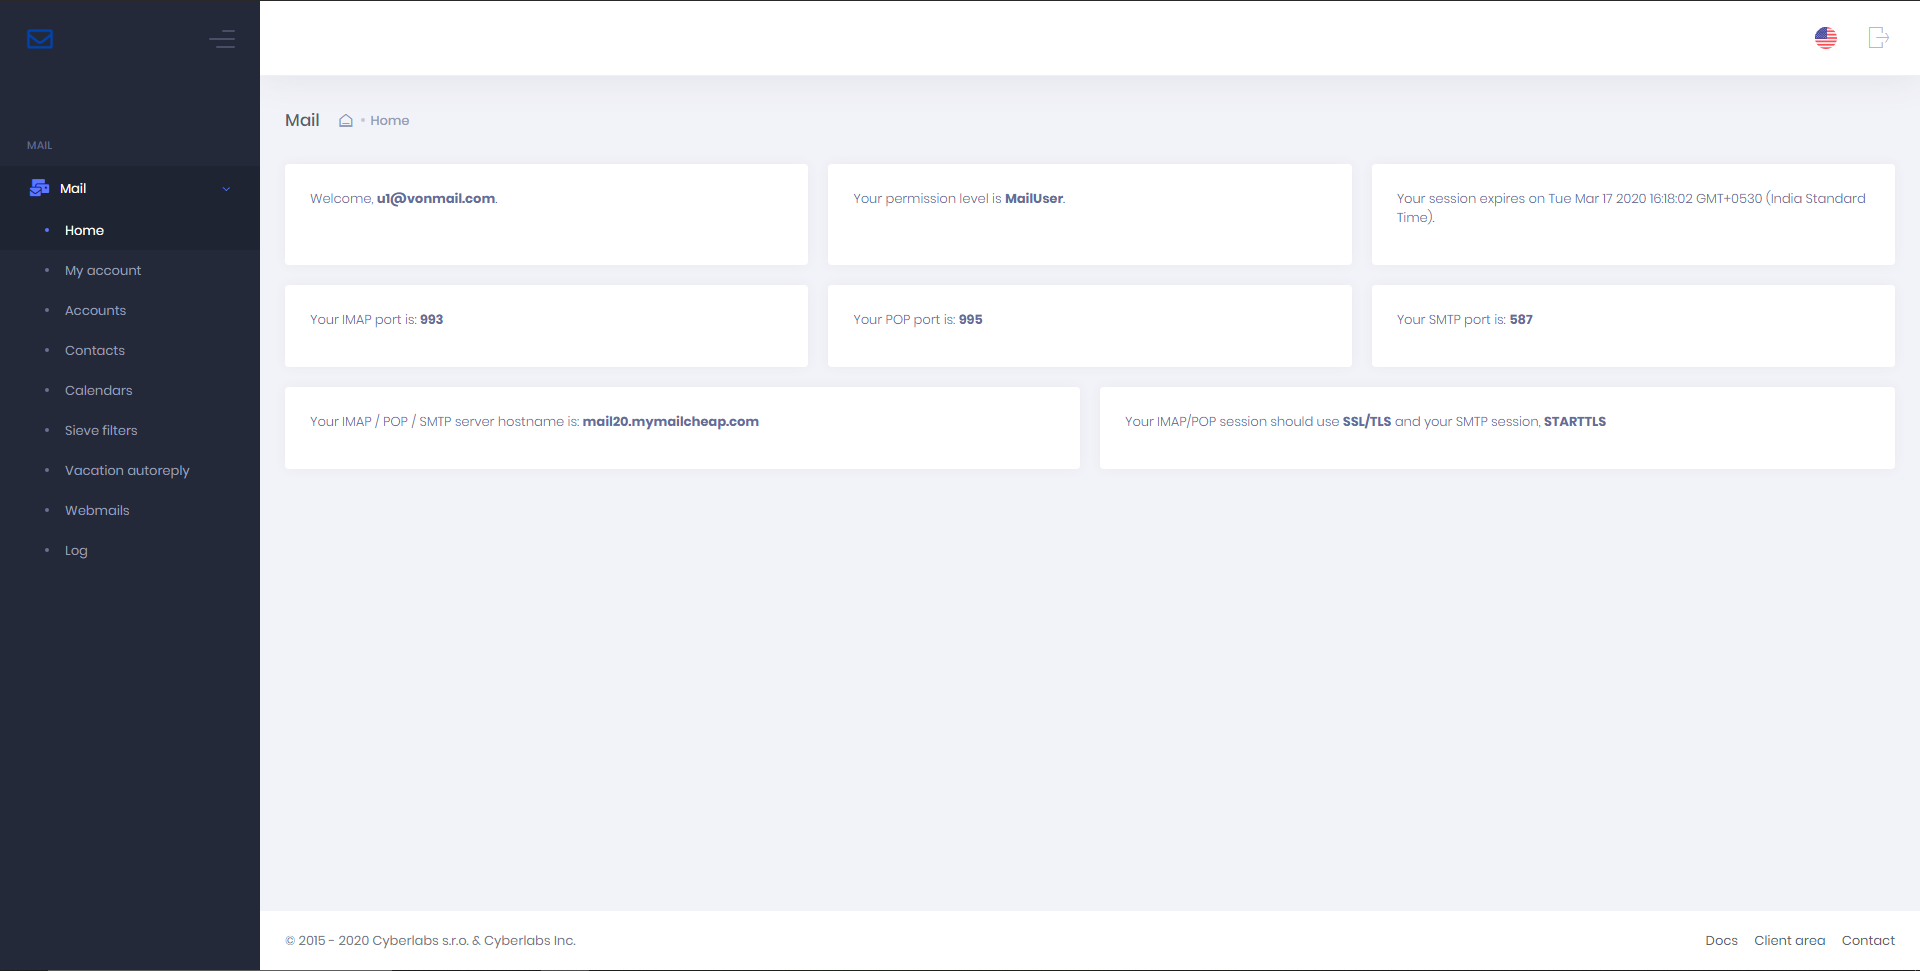
### Access webmail, contacts, calendars
Logout as admin and login as a MailUser (with email ID & password) in Mail Portal. Webmail, contacts, calendars, sieve-filtering & auto-responder can be found here.
***
### Next steps
Before you can send/receive emails, you must setup a few DNS records for your domain as explained in the [DNS setup docs.](https://documentation.exonhost.com/docs/general/setupdns)